Tuesday, December 14, 2010

Update 3 of 4


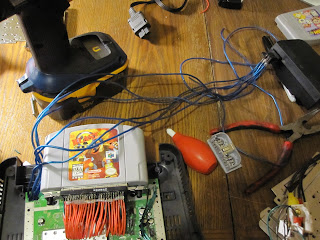
This is the view looking up through the bottom of the toaster.  At this point everything worked.


This is the top and bottom of the toaster, connected, and ready to be put together and finish the project.  I tested the system here and encountered a million problems.

First:  I kept shorting out my power adapters. I ended up taking out the LEDs and it really helped, but still had a problem later.  At this point I have not yet solved this issue.
Second: The video stopped working. It took me a long time, but i found that one of the wires on the catridge slot (that row of 25 wires) snapped off.  Of course it was in the hardest spot to work with.
Third:  The game booted, but i had no visual and crackling sound.  My video connection on the motherboard snapped, and my grounds for my audio were loose.
Fourth, and the biggest issue:  My player 1 controller was not recognizing the joystick.  Basically that meant you couldn't move around in any games.  If this was an issue in any other port, meaning player 2, 3, or 4, I would have ignored it.  However, the whole reason for this is so Lauren can play these 2 specific games.  I tried replacing the wires, solder points, controller ports, controllers, and nothing.  It turns out that a REALLY tiny filter capacitor on the underside of the motherboard got scratched or dislodged.  The solution would be to go straight to the source (pictured below)...

Chipt U8 is in essence the brain of the controllers.  I attached the pinout below for anyone who is curious.  Each controller has a communication, power, and ground.  So I needed to connect wires to the P1 Data, Ground, and 3.3V.  I took a picture with a quarter so you can see how ridiculously tiny these solder points are. 
Image


At these point I've burned myself in every way possible.  Today I decided to use my fingernail to tighten a screw.  For some reason I dismissed the fact that the screw was 900 degrees :(

Sunday, December 12, 2010

Update

I took out n64's stock audio video adapter.  It included s-video, RGB, composite, and stereo sound.  Fortunately, I only needed to take composite, left and right audio, and a single ground.  So it went from 12 solder points to 4.  This is how the RCA ports will be mounted in the toaster.


This picture shows working on the power.  The challenge was to relocate the power switch so that you could turn it on with the toaster lever.  The reason this was difficult is because the n64 uses two different power lines.  I ended up putting it before the ACtoDC adapter (that big block on the right side).


I have red LEDs that are going to make it look as if the toaster is hot.  I was experimenting here with the stock potentiometer, which is the knob that decides how toasty you want your bread.  I spent forever on this and gave up.  The pot's resistance range is HUGE and makes it really difficult.


 Everything needs to be custom built.  In this picture you can see the wooden pieces.  Those are going to help support the cartridge slot.  I cut those metal pieces on each side for support.


This is where I am at right now.  A couple things to notice.  I have a red switch on the left.  When you pull the lever down (once I mount it) it will hit the switch to power the system.  All the power wires you see are AC and they lead to that adapter.  I officially gave up on using the potentiometer and just mounted 3 red LCDs.  Since this picture was taken, I also backed them with tin foil to help diffuse the light the LEDs give off.


The only thing I have left to do is mount!  

Friday, December 10, 2010

Starting pieces

 This is the nintendo 64. 

This is the toaster that the n64 is going into.  My goal is to load the game from the top (like bread), have the engagement lever turn the system on, and have the knob adjust LEDs to make it look as if it is glowing red.

This is the motherboard taken out of the case.  The top left holds the power supply, the top right is the a/v port, the bottom corners are controller ports, the 3 silver squares are the CPU, RCP, and the RAM.  That rectangular piece around the top is the cartridge slot, where you plug the game in.

I need to relocate the cartridge slot.  When you pull it out, you expose 48 pins, which are tinned with solder in the picture.  I needed to run a wire from each pin to the corresponding point on the motherboard.

This is a picture of my first cart slot relocation which not only took 6 hours, but didn't work.  So after this I had to buy more n64s :( 

Teaching Gay how to solder 

This is my second attempt at the cart slot relocation.  I made the wire's different lengths, to adapt to a 90 degree turn., which is why they are different colors.  The game is plugged in just for stability.

Soldering those wires to the corresponding solder points. 

Success!  

In this picture i relocated the controller ports.  One is longer than the other because of it's placement in the case. 

Holes drilled for the rca ports.  Those are the yellow red and white plugs you used to see on devices like.

Holes drilled in the front.  Those four holes will house the controller ports. 

This is a piece of metal i'm going to use to mount the motherboard into the toaster.  I cold welded some nuts on the back so I could use bolts, because I don't want to have exterior holes.

 The mounting bracket being epoxied into the toaster case.

That is the junk motherboard from the first mess up i'm using for placement.  There you can see it mounted in the toaster.